Monday, 7 May 2012

Making Flaky Pastry

It is often stated that professional chefs don’t bother to make their own Flaky pastry, as the quality and convenience of the shop bought is excellent. I have always done the same, until now. Today I have decided to give making it myself a go, starting with an easy recipe.

I started by putting 4oz butter in the freezer for about an hour before I was ready to begin making my pastry. I weighed out 6oz of Plain flour, sieving this high over the bowl to add air to the flour. Next I removed my butter from the freezer and coarsely grated this into the flour. Using a palette knife (avoiding touching the cool pastry with your warm hands as much as possible), I began to combine the butter with the flour, when well combined and resembling chunky breadcrumbs (left), I added 1 tablespoon of chilled water.

Again I went in with my palette knife and began to combine the mix again.  In my case I needed to add a bit more water and then finished off using my fingertips to combine into a soft dough (right).
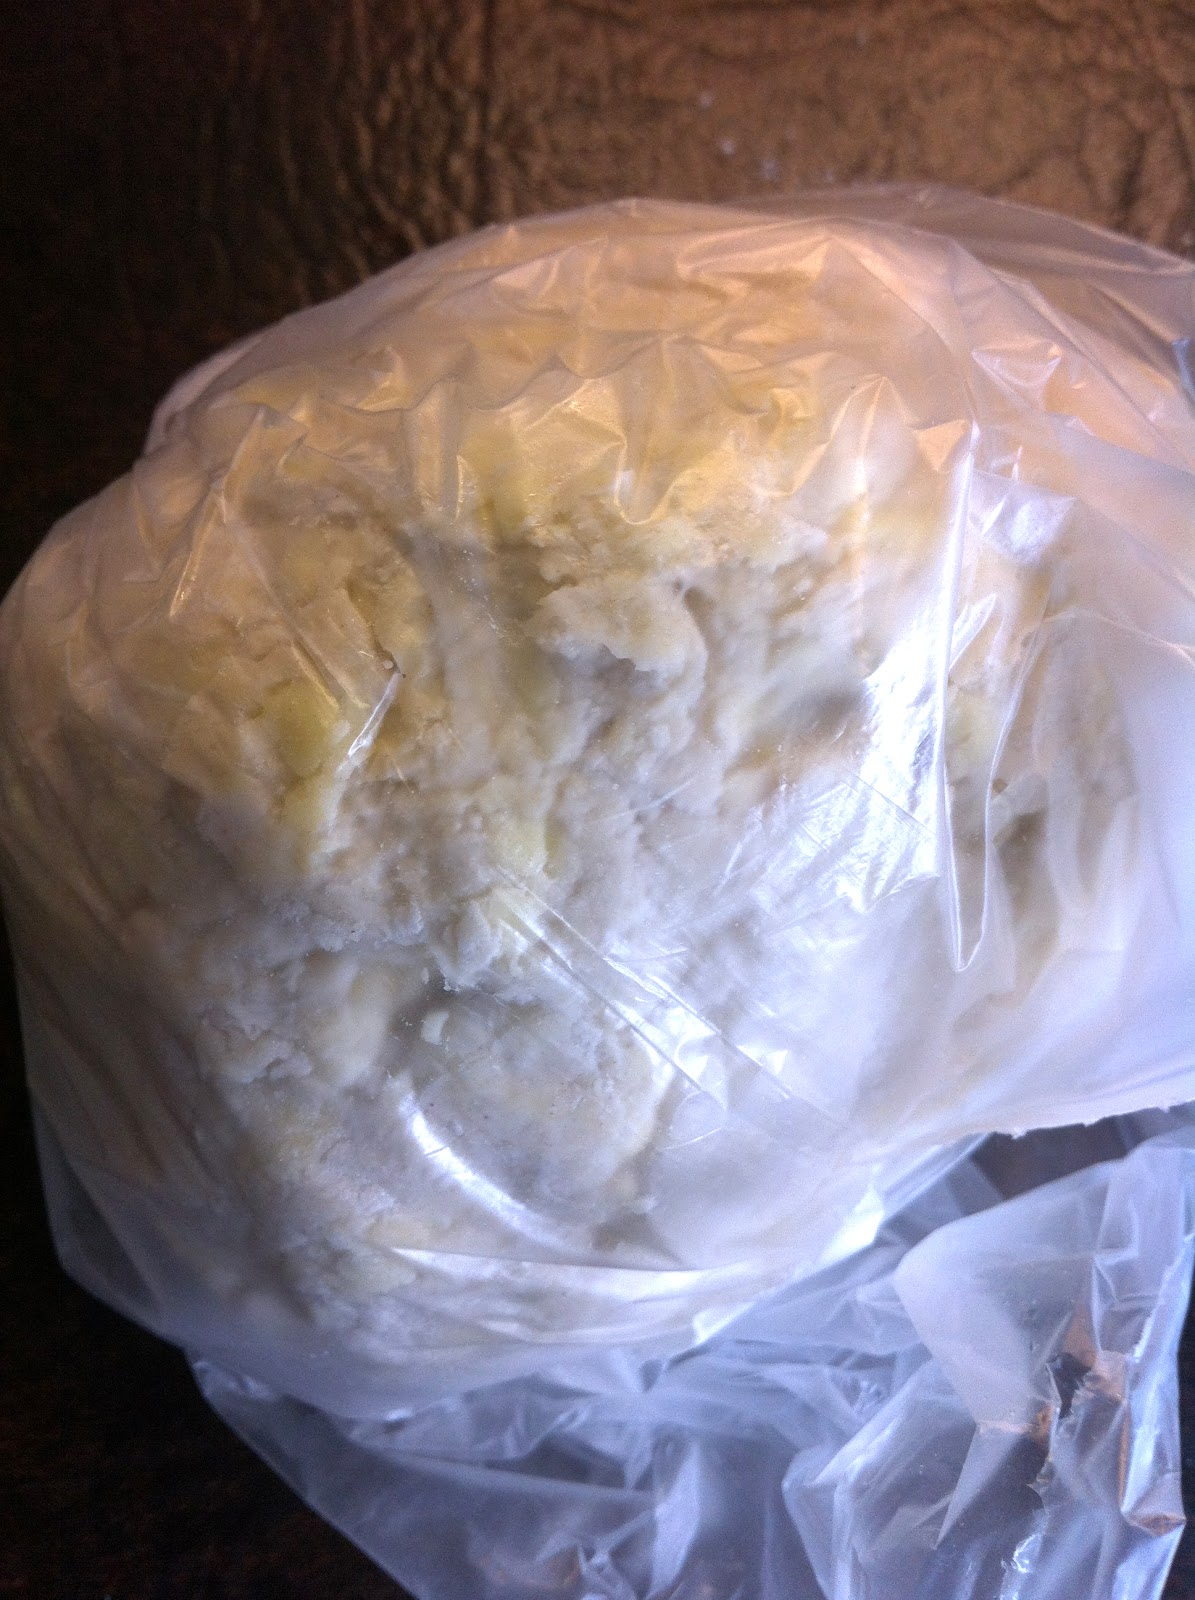

As with all pastry doughs, I rested this dough in a food bag in the fridge (left), in my case for a couple of hours, until I needed the dough.

Next I used my pastry to make a Field Mushroom Tarte Tatin. I have never made a savoury Tarte Tatin, only apple ones. Not sure if this is a common alternative, but with venison for dinner today, I thought it would go well together. First I placed a few dots of butter, seasoning and some thyme leaves followed by a field mushroom, presentation side down, in the base of an individual tart tin.  Next a teaspoon of homemade Red Onion Chutney, a little more seasoning, a layer of spinach leaves, followed by a sheet of pastry, carefully tucking this around the mushroom, to seal everything in (right).

I baked this in the oven for around 20 minutes, until cooked through and golden. To serve I inverted the tin onto my board, carefully turned the tart upside down and placed on the plate to reveal the field mushroom (below). It looks very attractive and I served it with Venison Loin with Celeriac Puree and a Port Sauce. It was delicious and not too time consuming for those who, unlike me, don’t enjoy spending all afternoon cooking!


Sunday, 29 April 2012

Bread Making


Many years ago I attempted to make a loaf of bread from Delia’s ‘How to Cook’. I’ve always loved the idea of making my own bread and so thought I’d have a go! I tried a simple wholemeal loaf in a 1lb bread tin, as this didn’t seem to adventurous.

I followed the instructions carefully, proving the dough in my airing cupboard. I’m not entirely sure what I had done wrong, but the bread turned out heavy, doughy and not very nice. In hindsight probably one of two things went wrong here, I either didn’t kneed it for long enough or I didn’t allow it to double in size at the proving stage. I never tried again for years, in fact the next attempt was at Ashburton Cookery School last year on my Intermediate week long course. This time we made individual white bread rolls and they were a great success – as the photo on the right demonstrates.

I was keen to try these at home to make sure that they were achievable outside the cookery school kitchen, pictured below.


Again I had success, yippee I could make bread and you could enjoy eating it too!

Since this success many friends and family have asked me for a good bread recipe, so I thought I’d blog about it to share with others too.

So here is the recipe that I tend to follow:


450g Strong Bread Flour (I use Shipton Mills, which is local)
1 teaspoon salt (I use Cornish Sea Salt)
2 tablespoon Olive Oil (or I use local Rapeseed Oil instead)
300ml Warm Water (blood temp.)
15g fresh yeast or 7g dried yeast
½ teaspoon sugar

Sieve the flour and salt together into a bowl. Make a well into the centre and pour in the olive oil start to combine this.

Add the tepid water to the yeast and sugar and whisk to combine..

Gradually add the water and yeast mix to the flour, you may not need all of the liquid, so go careful towards the end.

You are looking for a nice sticky (but not wet) dough at this stage. Knead for 10 minutes, until dough feels soft and elastic (don’t skimp on this stage, I usually start my mine off in my Kenwood Chef, and finish by hand, as you can get a better feel for the finished dough that way).

Place the dough into a lightly oiled bowl and place a damp tea towel over the top. Allow to prove for 1 hour – or until double the size. I don’t put mine in the airing cupboard though, I put it into the oven, that I previously preheated to about 80°C and then switched off, before commencing with the bread making. This provides a nice warm, place to prove the dough. The airing cupboard isn’t always warm enough, especially in the summer time.

When the dough is twice the size, sometimes this can take longer than 1 hour, remove from the bowl then knock back the dough for a few minutes.

You can now choose if you want a large loaf, 2 smaller loaves (divide dough into 2 pieces) or make individual rolls. You don’t need any special tins, bread works fine on a flat baking sheet or similar, in loaf tins or shaped into rolls.

If you are making a loaf make the shape you would like the finished loaf to be, or place into a tin if using one, slash the top with a serrated knife if you wish, flour and leave to prove for a further 30 minutes in a warm place.

Preheat your oven to 200°C now.

If you are making rolls, shaped as you wish and then brush with egg wash (1 whole egg beaten with a splash of milk) and again leave to prove for 30 minutes. At this stage you could add nuts, seeds or dried chilli flakes to the top of your rolls, I quite like sea salt, black pepper or both. There are no rules here, just whatever you fancy really.

Bake the rolls in the preheated oven for around 25 minutes, or until golden brown and they make a hollow sound when you tap the base. The loaf takes about 35 minutes.

To get a crispier finish to your bread, spray the oven occasionally during cooking with cold water. The steam helps to crisp the bread.


This afternoon I’ve made baguettes. Following the recipe above, but when shaping the dough, divide into 2 and stretch each half into a rectangle. Next roll the rectangle into a long sausage, twist and sprinkle with flour. Again, allow to prove for the 30 minutes as above, then into the preheated oven and using the water spray technique, back for around 30 minutes.

Store the bread in an airtight container in the fridge for up to 3 days or in an airtight container in the freezer. Straight from the fridge reheat in the oven for 5 minutes, or straight from the freezer reheat in the oven for 10 minutes (longer for loaves). This is a great success and I always make up a batch or two and use the rolls over the following week, reheated.


Here are the finished baguettes; 


...and served here with Skate Wing, crispy ham, new potatoes, salad and a caper and chilli butter.


I hope you have success in trying this recipe. As always feel free to ask any questions using the comment section below.


Sunday, 22 April 2012

Smoked Duck


This weekend I decided to have a go at smoking meat at home. I had previously eaten smoked meats, which was so over powering that it had always put me off.  So I thought I would have a go at smoking some myself, to ensure that I could get the smoked flavour just how I liked it.

When shopping at Riverford Farm Shop a few weeks ago, there was a wood turner there selling arts and crafts items. The wood turner was busy crafting with some wood and all of the shavings were piled high on the floor around his table. Geoff said ‘why don’t you ask them if you can take some shavings for smoking food with?’  So I asked the chap there and he was happy to let me help myself.

So, after spending some time researching smoking food, I was ready to have a go. Firstly I set up my utensils, I used a wok lined in tin foil, where I placed my wood shavings, orange blossom tea and a tablespoon of sugar.. I placed the wok on the hob to heat the shavings until they smoked. Next I placed a grill over the top of this and the placed a half duck on this, finally covering this with foil, as tightly as I could get it to provide a seal, left it all on the hob for a few minutes and then turned it off, leaving it all sealed up for 12 minutes to smoke. I was very concerned that I would over smoke it and it would taste like that duck I had previously tried.

After 12 minutes I removed the duck and put it in a baking tray and in the oven for 30 minutes, until the duck is just pink and still succulent.


I served the duck with basmati and wild rice with petis pois, a honey, soy and chilli glaze (basting the duck with this mixture throughout the cooking too). A pot of plum sauce on the side completed the dish.

The duck finished up nice and pink and moist, however it could have had a more smoky flavor, I was a bit too cautious on my first attempt. Next time I will try 18 minutes smoking instead of 12. Overall a success, but with a few tweaks to be made in search of perfection!

Wednesday, 18 April 2012

Julie & Julia


Today I have travelled to Birmingham and back in one day, to give a presentation at a Risk Management Conference for Housing Sector. After a very tiring, yet successful day, I am now returning by train back to Plymouth. What bliss to blogging, whilst travelling on the train!

I must let you know, that during my trip home I have just finished watching, my most favourite film ever, again! Julie & Julia.


For those of you haven’t already had the pleasure of watching this amazing film, it is a true story, about an American Secretary, Julie Powell, who set herself the challenge of cooking her way through all of the recipes in Julia Childs ‘Mastering the Art of French Cookery’ in just one year.

Easy I hear you say, no think again, there are 524 recipes in this book of over 700 pages. These are not your quick and easy simple meals either; these are intense recipes consisting of complex dishes, the most famous being Boeuf Bourguignon (beef stewed in red wine with bacon, mushrooms and onions), which takes over 2.5 hours to cook. Julie blogs about her achievements and disasters throughout the year, and gains quite a fan base all of her own as a result. Eventually her blog becomes so popular that she is offered a book publishing deal and then the book is made into this fantastic film.

Meryl Streep plays the amazing Julia Child and Amy Adams, Julie Powell, two great actresses, perfect for their roles.

I have read ‘Mastering the Art of French Cookery’ Vol. 1 from cover to cover, and loved every turn of the page, I still need to buy Vol. 2.


I know I usually have a recipe to share, but today it’s a bit different with a culinary film and book to share instead. Soon I shall be blogging about bread, as I have been asked for a bread recipe 3 times in as many weeks and I have a great one to share with you, so watch this space...

Sunday, 15 April 2012

Tenderloin of Goat

As commented earlier today, I bought a tenderloin of Goat yesterday at the Exeter Festival of South West Food & Drink 2012. Today I set this marinating in Orange Blossom Honey, Rosemary, Mint, Olive Oil and Balsamic Vinegar for around 4 hours. Then sealed it in a hot pan, finishing it in a moderate oven for 8 minutes, served with Kohlrabi, carrots and Jersey Royal Potatoes and Oat Bread.


Well, I am not gonna say Goat is something I'd bother to try again - it tastes rather like lamb, but it's quite tough - even though it had had 10 minutes resting time following cooking. It was nice and medium rare, but lamb is better, this was certainly interesting to try though!

Following this, I made Chocolate Brownie, which was all gooey in the middle and served it with my homemade vanilla ice cream - perfect!

Exeter Festival of South Food West Food & Drink 2012

I have been going to the Exeter Festival of South West Food & Drink since 2004, the year it started. My first visit was by pure chance, I was in Exeter and happened upon the festival and so decided to take a look.
I didn't have long this first time, as I was working in Exeter that day, however I remember it well and being excited by the variety of things going on.


Each year since I have planned to attend and in more recent years I have been going for two of the three days that the festival takes place on. One day on my own, the other day with Geoff (who can only manage one day!).


The Festival this year has been amazing, my two favourite demonstrations were firstly by Duncan Glendinning and Patrick Ryan from The Thoughful Bread Company


The Thoughtful Bread Company Book
These guys were demonstrating some recipes from their book, of which was for sale on the day at an amazing reduction from £17.99 to £10.00. I was keen to buy a book, but the queue was long and the supply of books on the day low.
By the time my turn came, sadly they had all gone. After a quick chat with the PR & Marketing person from The Thoughful Bread Company, she kindly agreed to post me a signed copy for the same cost, so I am really looking forward to that one arriving, so that I can test out some recipes. Obviously I will add these to Culinary Revelations too! This book is available on Amazon too, at a great price.


The second of my favourites was of course the guys from Ashburton Cookery School, who should really be on TV with their own series, as they are fun to watch and such enthusiasm and knowledge to share. As always it was Chef Director Darrin Hosegrove and Chef Manager Rob Dawe, who capitalise on their good friendship and sense of humour. They cooked 3 dishes, all looked and smelt delicious (I was in the front row!).
Each year the Ashburton Cookery School always bring along 2 or 3 goody bags for fun, they ask a question of audience and choose someone to respond, if you get the question right, you win a goody bag. This year one of the questions was, who was Carpaccio named after? So Geoff and I raised our hands, and Rob said 'Right I'm going to choose someone good looking in the audience to answer this one, Geoff piped up - 'well I'm good looking!' and Rob said 'Yes you are!' and asked Geoff to answer the question, 'Vittore Carpaccio' Geoff said correctly and Rob handed him the goody bag and shook his hand. In the bag was a leaflet on the School, an apron, a notebook and an Ashburton Cookery School mug. After the show, Geoff gave me the bag and contents - yippee, thanks Geoff! 


Every year at the Festival the amount of stalls selling food produce, drink and cooking equipment grows, this year was no exception to that! As usual I bought one or two things, including two beautiful chopping boards, a small one and a large one.
This year I also bought a new meat product for me, some Tenderloin of Goat, pictured here on my new chopping boards:


I shall be cooking this for todays dinner, marinated in Orange Blossom Honey with Rosemary and Mint, serving it with New Potatoes and Oat Bread.


I also signed up to the Well Hung Meat Company Foodies Favourite Box, to be delivered monthly too. They were doing an offer where if sign up at the Festival, you were given a free steak to try. We opted for Rump Steak and shared this for dinner last night, pan fried with mushrooms and served with crusty bread. I have to say that it was fantastic steak and I am very excited about receiving my first box in 4 weeks time.


Other highlights of the day definitely included Tim Bouget from Ode's in Shaldon, who did a very tasty Pork Fillet dish, of which I was invited for the first taste of, for correctly answering his question on where he had picked the wild garlic for his dish from earlier that day - Gappah was the answer! I had used my phone to log on to his FaceBook page to find out the answer to this.


So, as with every year, the Festival never disappoints, and this year was no exception to that rule. I enjoyed both days very much. You can just see Geoff and I to right of this photo, in the front row.
Tim was competing in a Masterchef style cook off with Ollie Harry from St Olaves restaurant in Exeter.


So another year at the Festival has passed and I am already looking forward to the Exeter Festival of South West Food & Drink 2013!

Tuesday, 10 April 2012

Brawn Recipe

So, my previous post shared 'why Brawn', so this post is the 'how!'

Recipe
1 Pigs Head (including Ears)
2 Pigs Trotters
3 Large Carrots
1 Large White Onion
Bunch of Fresh Thyme
3 Cloves
4 Bay Leaves
Handful of Black Peppercorns
2 Sticks of Celery
1 kg Table salt

On my return from the Farm Shop in Stokenham, I set to work. First I burnt all the hair and eye lashes off of the Pigs Head, using a cooks blowtorch. Next I cleaned the ears and nose, finally followed by the teeth - using an old toothbrush and soap. Much of the bacteria lives around the mouth, nose and ears, so it's important to clean these thoroughly.

Next I placed him in a large bucket with 3 litres of cold water and around 1kg of salt, just ordinary table salt is fine here. Here he sat in cool place for 24 hours, in my case my utility room. After about 18 hours, I put in the 2 pigs trotters and the ears, to sit in the brine for the final 6 hours.

The following day I brought him back to the kitchen and rinsed him thoroughly to remove the salt.

Next I placed him in a large stockpot and covered with cold water. In with the water I placed 3 large carrot, 1 white onion, a good bunch of thyme, 3 cloves, a handful of black peppercorns, 4 bay leaves and 2 sticks of celery. This was all brought to the boil, covered and simmered for 4.5 hours. I then allowed this to cool overnight, again back in my utility.


Finally, on the Sunday I strained off about a litre of the cooking stock into a jug, removed the head and discarded all the other ingredients and remaining stock. I then set about picking all of the meat from the head and slicing the tongue into similar sized pieces. Using a 2lb loaf tin, first I lined it with cling-film as smoothly as possible. In the base, I decorated with Bay Leaves so that when you turn the terrine out, it looks attractive for serving.

Next I layered the pulled pork and cooking stock until the tin was filled. Covering the top of the Brawn, I added a weight - in this case I used a 1 kg bag of rice, because that was handy. Place the tin and weight in the fridge for around 12 hours to allow the jelly to set. I cut it into thick slices and served with New Potatoes, Red Onion Chutney and a green salad.

Yes, I had achieved it... The sense of satisfaction was great - I really felt that I had defeated quite a large task and was proud!

Now, the most important thing to remember here is Brawn is not everyone's idea of a good meal, there are a lot of people out there who would not consider trying it, put off by its ingredients. No-one I know would consider eating it.

Brawn freezes really well, so I sliced my Brawn, wrapped in Cling-film, labelled and put in the freezer.

Brawn is an old fashioned dish, created in a time where the whole animal needed to be made use of, this nose-to-tail concept that I mentioned in my earlier blog post.

If you would like to have a go at this, but the whole Pigs Head thing is not for you, the same principle could apply to a whole chicken instead, follow the above recipe, but halve everything and use a whole chicken, simmer for around 2.5-3 hours instead of the full 4.5 hours as with the Pigs Head Brawn, depending on the size of the chicken you are using. Cover with 1.5 - 2 litres of water and add 4-500g salt;


Recipe for Chicken Terrine
1 Large, whole Chicken
2 Medium Carrots
1 Medium White Onion
Bunch of Fresh Thyme
2 Cloves
2 Bay Leaves
Around 8-10 Black Peppercorns
1 Sticks of Celery
500g Table Salt

Using another cut of the pig would also be fine, shoulder would work well for example.

My Finished Dish - Served here with Homemade Red Onion Chutney
So, this challenge has now been defeated. I may make some attempts at some other terrines now that I've done this one. Have fun with this, let me know if you have a go - or would like any further advice!